Compress Vocal

Compressing vocals in audio production is a common technique used to control dynamic range and make the vocals sound more polished and consistent. Dynamic range is the difference between the loudest and quietest parts of the vocal performance. Compression helps to even out these levels, making the vocals more intelligible and present in the mix. Here's how you can compress vocals: Choose the Right Compressor: Select a suitable compressor for your vocal track. There are various hardware and software compressors available, each with its own unique characteristics. Common software compressors include the Waves SSL G-Master Buss Compressor, FabFilter Pro-C, and Universal Audio LA-2A, among others. Set the Threshold: Start by setting the threshold control. This determines the level at which the compressor begins to act. Set it so that it catches the louder peaks of the vocal, typically around -3 dB to -6 dB below the average level of the vocal. Adjust it to taste. Adjust the Ratio: The ratio control dictates how much compression is applied when the signal exceeds the threshold. A common starting point is a 4:1 ratio, but you may need to adjust this depending on the vocal and the style of music. Higher ratios result in more aggressive compression. Attack and Release Time: These settings determine how quickly the compressor responds and recovers. For vocals, you usually want a relatively fast attack (around 5-20 ms) to catch transients, and a medium release time (50-100 ms) to avoid pumping. Adjust these settings based on the characteristics of the vocal performance. Set the Makeup Gain: After applying compression, the overall level of the vocal may drop. Use the makeup gain control to bring the compressed signal back to the desired level. Be careful not to overdo it, as it can introduce noise or distortion. Use a Soft Knee: Soft knee compression results in a smoother transition from uncompressed to compressed sound. It's often preferred for vocals as it's less noticeable. Monitor and Fine-Tune: Listen carefully to the vocal and make adjustments as needed. Continuously check your mix to ensure that the compressed vocals sit well in the context of the song. Parallel Compression (Optional): You can also apply parallel compression to preserve some of the natural dynamics while enhancing the compressed sound. This involves mixing the compressed signal with the dry (uncompressed) signal. De-Essing (Optional): If the vocal has sibilance issues (harsh "s" and "sh" sounds), consider using a de-esser before or after the compressor to control these frequencies. Remember that the settings may vary depending on the specific vocal performance and the genre of music you're working on. Experimentation and careful listening are essential in achieving the best results.
QE VOCAIL
"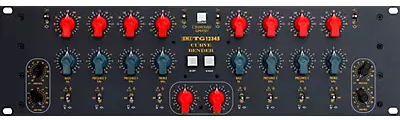 EQ vocal" refers to the process of equalizing the frequency response of a vocal recording using an equalizer (EQ). Equalization is a crucial step in audio production that involves adjusting the levels of different frequency bands in a sound signal to shape the overall tone and timbre of the vocal performance.
When working with vocal recordings, engineers and producers use EQ to enhance the clarity, presence, and balance of the vocals within a mix. Here are some common techniques for EQing vocals:
High-pass filter: Remove low-frequency rumble and unwanted low-end frequencies by applying a high-pass filter. This helps to clean up the vocal track.
Presence boost: Boosting the mid-range frequencies, typically in the 2 kHz to 5 kHz range, can help the vocals cut through the mix and sound more present.
De-essing: Use a de-esser to reduce sibilance and harsh "s" and "sh" sounds by attenuating specific high-frequency ranges.
Notch filtering: Address problematic resonant frequencies or remove unwanted frequency peaks by applying narrow cuts (notch filters).
Low-frequency control: Adjust the low-end frequencies to balance the warmth and depth of the vocals without causing muddiness.
Shelving filters: Modify the overall tonal balance by using low and high-frequency shelving filters.
EQ automation: Apply dynamic EQ adjustments to tackle vocal dynamics and resonance issues that vary throughout the performance.
The specific EQ settings and techniques you use will depend on the characteristics of the vocal recording, the genre of music, and the creative direction of the mix. It's essential to use your ears and make precise adjustments to achieve the desired vocal sound while avoiding excessive processing that can lead to unnatural or undesirable results.
A good pair of speakers for mastering.
EQ vocal" refers to the process of equalizing the frequency response of a vocal recording using an equalizer (EQ). Equalization is a crucial step in audio production that involves adjusting the levels of different frequency bands in a sound signal to shape the overall tone and timbre of the vocal performance.
When working with vocal recordings, engineers and producers use EQ to enhance the clarity, presence, and balance of the vocals within a mix. Here are some common techniques for EQing vocals:
High-pass filter: Remove low-frequency rumble and unwanted low-end frequencies by applying a high-pass filter. This helps to clean up the vocal track.
Presence boost: Boosting the mid-range frequencies, typically in the 2 kHz to 5 kHz range, can help the vocals cut through the mix and sound more present.
De-essing: Use a de-esser to reduce sibilance and harsh "s" and "sh" sounds by attenuating specific high-frequency ranges.
Notch filtering: Address problematic resonant frequencies or remove unwanted frequency peaks by applying narrow cuts (notch filters).
Low-frequency control: Adjust the low-end frequencies to balance the warmth and depth of the vocals without causing muddiness.
Shelving filters: Modify the overall tonal balance by using low and high-frequency shelving filters.
EQ automation: Apply dynamic EQ adjustments to tackle vocal dynamics and resonance issues that vary throughout the performance.
The specific EQ settings and techniques you use will depend on the characteristics of the vocal recording, the genre of music, and the creative direction of the mix. It's essential to use your ears and make precise adjustments to achieve the desired vocal sound while avoiding excessive processing that can lead to unnatural or undesirable results.
A good pair of speakers for mastering.